TRENDING
Easy Peppermint Bark Recipe for Sweet Holiday Gifting

10 min read
Last updated November 8, 2026
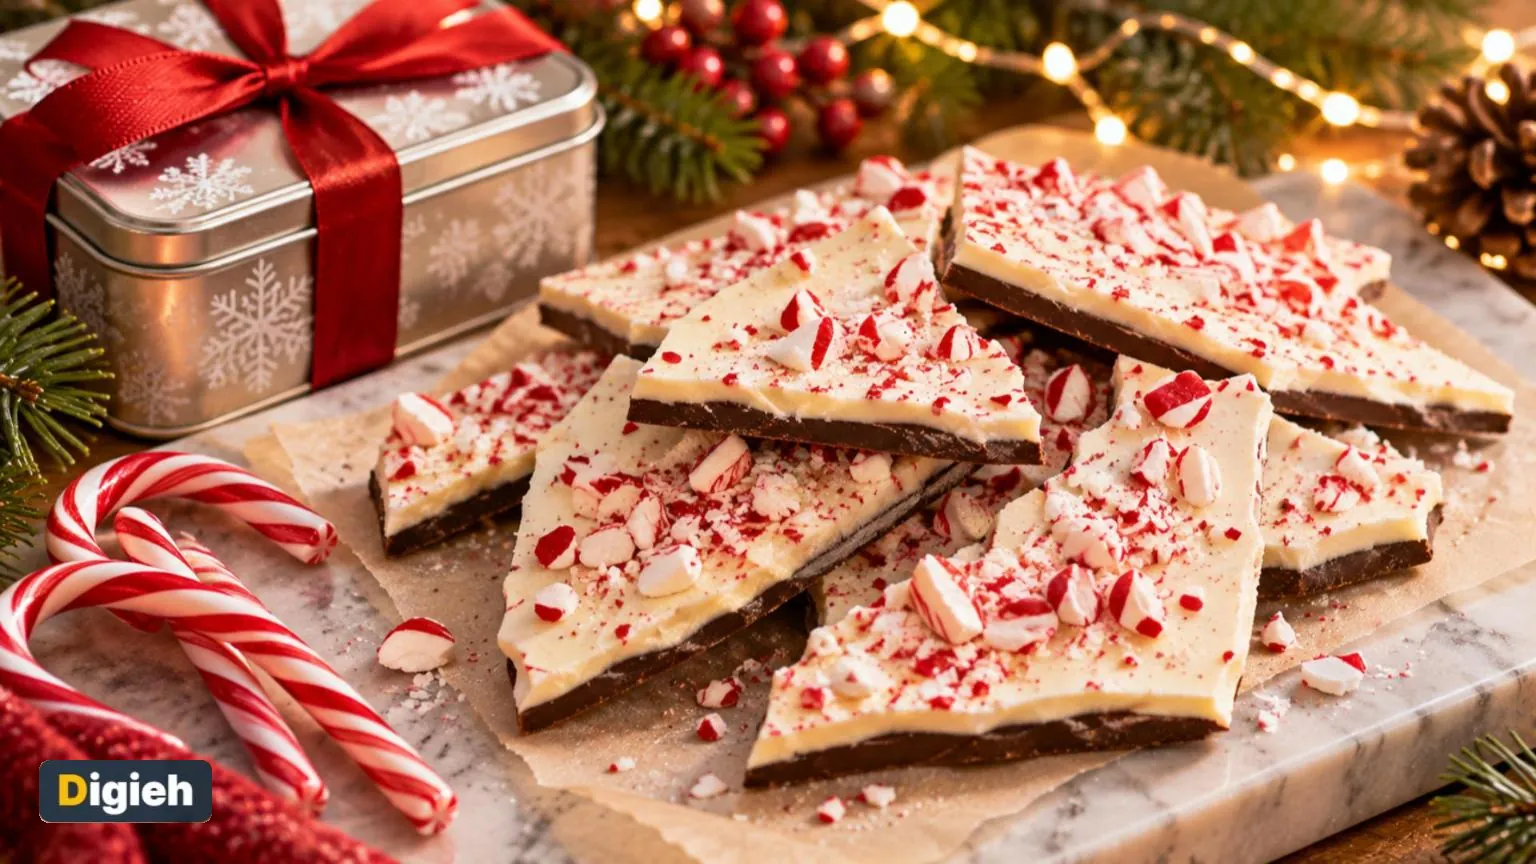
Peppermint bark is one of the easiest holiday candies you can make. Melt a layer of dark chocolate, top it with white chocolate, sprinkle on crushed candy canes and let it set.
There is no candy thermometer and no baking. In under an hour of active time, you will have a big tray of festive treats to share.
Key Takeaways
- You need only a handful of ingredients.
- Keep melting chocolate completely dry to avoid seizing.
- Melt in short bursts and stir often.
- Let the first layer set slightly before adding the second.
- Peppermint bark ships well at room temperature.
Three Ingredients, Big Payoff
At its heart, peppermint bark needs just three things. Good chocolate, candy canes and a little patience.
A small splash of peppermint extract boosts the minty flavor. Use it in the dark chocolate layer only, since white chocolate is more delicate.
Because the ingredient list is short, quality really shows. Choose chocolate you enjoy eating on its own.
115 degreesThe top temperature for melting chocolate, according to the Exploratorium.
Picking Your Chocolate
| Type | Flavor | Melting Notes |
|---|---|---|
| Semisweet or dark bars | Rich and slightly bitter | Melts smoothly and sets firm |
| Chocolate chips | Sweet and convenient | Contain stabilizers, so they melt a bit thicker |
| White chocolate bars | Creamy and sweet | Scorches easily, so melt gently |
| Candy melts | Very sweet | Easy to melt but less rich |
Bars usually melt more smoothly than chips. Chop them into small, even pieces before melting.
Small pieces melt at the same pace, so no chunk overheats while others stay solid. A serrated bread knife makes chopping a thick bar much easier.
If you only have chips, they still work. Expect a slightly thicker melt and a softer set.
What is your favorite holiday candy to make?
- Peppermint bark
- Fudge
- Toffee or brittle
- Not sure
Tools You Will Need
You likely own everything already. Gather these before you start, so the chocolate does not sit waiting.
- A 9×13-inch baking pan
- Parchment paper
- Two microwave-safe bowls
- A rubber spatula
- A zip-top bag and rolling pin for crushing candy
- A sharp knife for chopping chocolate
Make sure every bowl and tool is completely dry. A single drop of water can cause problems later.
Ingredient List
This recipe fills a 9×13-inch pan and makes about 24 pieces.
- 12 ounces semisweet or dark chocolate, chopped
- 12 ounces white chocolate, chopped
- 1/2 teaspoon peppermint extract
- 6 to 8 regular candy canes, crushed (about 3/4 cup)
Making candy for a big swap or many gift boxes? The scaler shows how many pans you need.
Servings scaler
One 9×13-inch pan makes about 24 pieces.
Method at a Glance
Prep the Pan (5 Minutes)
Line a 9×13-inch baking pan with parchment paper, leaving some overhang on the sides. The overhang makes it easy to lift the bark out later.
Crush the Candy Canes (5 Minutes)
Unwrap the candy canes and place them in a zip-top bag. Seal it and tap with a rolling pin until you have small pieces and some fine dust.
Melt the Dark Chocolate (3 Minutes)
Put the dark chocolate in a dry, microwave-safe bowl. Heat in short bursts, stirring between each, until smooth. Stir in the peppermint extract.
Spread and Chill (15 Minutes)
Pour the dark chocolate into the pan and spread it into an even layer. Chill it until just firm to the touch but not fully hard.
Melt the White Chocolate (3 Minutes)
Melt the white chocolate the same way, using even shorter bursts. Stop as soon as a few small lumps remain, and stir until smooth.
Layer and Top (5 Minutes)
Pour the white chocolate over the dark layer and spread it gently. Sprinkle the crushed candy canes over the top right away and press them in lightly.
Set and Break (1 Hour)
Chill until fully firm, about an hour. Lift the bark out using the parchment and break it into rustic pieces with your hands or a knife.
Quick tip. Sift crushed candy canes through a strainer. Save the fine dust to stir into hot cocoa.
Melting Chocolate Without Trouble
Chocolate is easy to melt, but it can be fussy. A few rules make it foolproof.
Use Short Microwave Bursts
King Arthur Baking prefers the microwave for melting chocolate, in its melting guide. It suggests 30-second bursts, stirring between each one.
Keep It Completely Dry
Even a small splash of water can turn melted chocolate thick and grainy. King Arthur notes that other liquids like extracts can also cause trouble if stirred into chocolate at the wrong time.
To be safe, add extract only in small amounts and stir it in quickly. Dry your bowl and spatula well before you start.
Watch the Heat
The Exploratorium advises not letting chocolate go above about 115 degrees, in its science of cooking column. Hotter chocolate can scorch or turn dull.
White chocolate melts at a lower temperature and burns more easily. Treat it gently and stir often.
Good to know. Steam from a pot can drip into chocolate and make it seize. Keep lids and spoons dry.
Rescuing Seized Chocolate
If your chocolate suddenly turns stiff and lumpy, it has seized. It is not ruined for every use.
The Exploratorium suggests whisking in warm water a tablespoon at a time, or a few drops of vegetable oil. The texture changes, so use the rescued chocolate as a sauce or drizzle rather than a smooth layer.
For bark, it is usually best to start fresh. Save the seized batch for hot chocolate or a topping.
Choosing and Crushing Candy Canes
Classic red and white candy canes give the best look. Flavored canes, like cherry or cinnamon, add a fun twist if you want variety.
Aim for a mix of small chunks and fine bits. Large pieces can be hard to bite, while very fine dust melts into the white chocolate.
Crush the candy just before using it. Peppermint pulls in moisture from the air and can get sticky if it sits out too long.
Why Layers Sometimes Separate
A common problem is the white layer sliding off the dark layer. This happens when the bottom layer gets too cold and hard before you add the top.
Chill the dark chocolate only until it is just set, about 15 minutes. It should feel firm but not glassy.
Another trick is to pour the white chocolate while it is warm but not hot. Too much heat can melt the bottom layer and blur the stripes.
What makes melted chocolate seize?
- Stirring it
- A small splash of water
- A cold pan
Even a little water can turn chocolate thick and grainy.
Fun Variations
Triple layer. Add a milk chocolate layer in the middle for extra stripes.
Dark chocolate only. Skip the white chocolate and top dark chocolate with crushed candy canes and sea salt.
Cookie crunch. Sprinkle crushed chocolate sandwich cookies along with the peppermint.
Festive swirl. Dot the dark layer with white chocolate, then drag a toothpick through it for a marbled look.
Holiday colors. Add red and green sprinkles with the candy for a playful touch.
Want Extra Shine and Snap?
Professional candy makers temper chocolate to give it a glossy finish and a crisp snap. Tempering means carefully heating and cooling chocolate to set it in a stable form.
For homemade bark, tempering is optional. Simple melting tastes great, though the bark may look a little less shiny and soften faster in warm rooms.
Many home cooks use a simple shortcut. They melt about two-thirds of the chocolate, then stir in the remaining chopped pieces until smooth. This gentle method often gives a better finish without special tools.
Free updates
Join the Digieh list
Be the first to know when our weekly brief launches.
No spam. Unsubscribe anytime. Read our Privacy Policy.
Make It a Family Bark Party
Peppermint bark is a fun project for kids. Let them crush the candy canes in a sealed bag, which is safe and satisfying.
Older kids can help spread the chocolate and sprinkle toppings. Adults should handle the microwave and hot bowls.
Set out bowls of sprinkles, mini marshmallows and crushed cookies. Everyone can decorate their own corner of the pan.
Allergy-Friendly Swaps
Dairy-free. Use dairy-free dark chocolate and a dairy-free white baking bar. Check labels, since many chocolates contain milk.
Nut-safe. Many chocolates are made in plants that also process nuts. Look for labels that clearly state nut-free production if you are sharing with people who have nut allergies.
Less sugar. Choose a dark chocolate with a higher cocoa percentage. It tastes richer and less sweet.
Always list the main ingredients on gift tags. Friends with allergies will appreciate it.
Storing Peppermint Bark
Store bark in an airtight container at cool room temperature. Separate layers with parchment or wax paper.
Keep it away from heat and humidity, which can make candy canes sticky. In a warm house, the fridge works, but let pieces come to room temperature before serving.
Well-sealed bark stays fresh for a couple of weeks. That makes it a great make-ahead gift.
- Line the pan with parchment
- Use a dry bowl and spatula
- Melt in short bursts
- Chill the first layer just until set
- Top quickly with candy
- Store airtight and cool
Packaging Bark as Gifts
Peppermint bark looks beautiful in clear bags or festive tins. Line the container with parchment and stack pieces loosely.
Tie bags with ribbon and add a small tag. Include the date and a note that it contains chocolate and dairy.
Pair bark with other homemade treats for a sampler box. Our easy Christmas fudge and soft gingerbread cookies make great partners.
Which chocolate scorches most easily?
- Dark chocolate
- Semisweet chocolate
- White chocolate
White chocolate melts at a lower temperature and burns more easily.
Shipping Bark to Friends and Family
Candy is one of the safest foods to mail. Sweets like candy can ship at room temperature. The University of Missouri Extension explains why in its holiday food gift guide.
Use a sturdy box and fill empty space with crumpled paper. Less air inside the box keeps pieces from breaking.
List the contents on the package and let the recipient know it is on the way. For tips on saving money, see our guide to holiday shipping.
Avoid shipping chocolate to very warm places. If you must, choose faster delivery so it spends less time in a hot truck.
Add to calendar
Make-Ahead Holiday Timeline
Two weeks before. Buy chocolate, candy canes and gift packaging while stores are well stocked.
One week before. Make the bark and store it airtight in a cool spot.
Five days before. Pack gift tins and bags, and add labels.
Three days before. Ship boxes early in the week, so they do not sit in a warehouse over a weekend.
Party day. Arrange the remaining bark on a dessert board.
How Much to Make
One pan gives about 24 pieces. For a gift bag, four to six pieces looks generous.
For a party dessert table, plan about two pieces per guest when you serve other sweets. Bark is rich, so small pieces go a long way.
Serving Ideas
Peppermint bark is great on its own, but it shines on a holiday dessert board. Arrange it with cookies, fudge and fresh fruit.
Chop small pieces and stir them into a mug of our homemade hot chocolate. The bark melts into a minty, creamy drink.
Bringing treats to a party? Peppermint bark is easy to share at a holiday cookie exchange.
Try this today. Buy a few extra candy canes and a bag of chocolate. You can make a batch of bark tonight in under an hour.
Frequently Asked Questions
Why did my chocolate get thick and grainy?
It probably seized from a drop of water or too much heat. Keep tools dry and melt in short bursts.
How do I keep the layers from separating?
Add the white chocolate while the dark layer is just set, not fully hard.
Do I need to temper the chocolate?
No. Tempering adds shine and snap, but simple melting works fine for homemade bark.
How long does peppermint bark last?
Stored airtight at cool room temperature, it stays fresh for about two weeks.
Can I mail peppermint bark?
Yes. Candy ships well at room temperature. Pack it snugly and avoid very hot climates.
Conclusion
This easy peppermint bark recipe turns a few simple ingredients into a festive treat. Melt gently, layer at the right moment and top with plenty of crushed candy canes.
Make a batch for your family and wrap the rest as gifts. Few homemade treats look this pretty for so little effort.
Found this useful?
Editor’s Note
This recipe is accurate as of November 8, 2026. Melting tips come from King Arthur Baking and the Exploratorium. Shipping guidance comes from the University of Missouri Extension.
Spot an error in this article? Please contact us at support@digieh.com or read our Corrections Policy.
Keep exploring
Your next read is waiting
 1Food & LifestyleWhich Holiday Foods Can You Fly With Safely10 min read
 2HealthStrep Throat Signs and Smart Steps to Recover10 min read
 3Finance & MarketsHSA Limits for 2027 and Smart Saving Tips9 min read
 4TechnologyCold Weather Car Battery Tips That Prevent Breakdowns10 min read
 5EntertainmentWhite Elephant Gift Ideas Everyone Will Fight Over10 min read
 6SportsEssential Skiing Tips for Beginners on the Slopes10 min read