
TRENDING
How to Carve a Turkey Like a Pro

10 min read
Last updated November 8, 2026
You spent hours roasting the perfect bird. Now everyone is watching as you pick up the knife.
Carving a turkey can feel intimidating, but it is really just a series of simple cuts. Once you know where the joints are, the bird almost comes apart on its own.
This guide walks you through every step, from resting the turkey to arranging a beautiful platter. You will also learn how to store leftovers safely.
Key Takeaways
- Check that the turkey reaches 165 degrees before carving.
- Let the turkey rest about 20 minutes so the juices settle.
- Cut through joints, not bones, for clean pieces.
- Slice breast meat across the grain for tender slices.
- Refrigerate leftovers within two hours.
165°FThe minimum safe internal temperature for turkey, according to University of Illinois Extension.
Before You Carve
Check for Doneness
Safety comes first. According to the University of Illinois Extension thermometer guide, whole turkeys should reach a minimum internal temperature of 165 degrees.
Insert a food thermometer into the thickest part of the inner thigh, away from the bone. Then check the innermost part of the wing and the thickest part of the breast.
Do not rely only on a pop-up timer. A food thermometer gives you a reliable reading in each spot.
Let It Rest
Move the turkey to a cutting board and let it rest about 20 minutes. The Illinois Extension carving guide explains that resting lets juices redistribute, which makes slicing easier.
Tent the bird loosely with foil while it rests. Use the time to finish gravy and warm the side dishes.
Resting also makes the bird easier to handle. A turkey straight from the oven is very hot, and steam can burn your hands.
If your kitchen is cool, a slightly longer rest is fine. Just keep the bird loosely covered so it stays nice and warm for serving time at the table.
Who carves the turkey in your home?
- I do
- Another family member
- We buy it pre-sliced
- Not sure
Gather Your Tools
- A sharp carving knife or chef’s knife
- A long-tined meat fork
- A large cutting board with a groove for juices
- A small cutting board for legs and thighs
- A warm serving platter
- A kitchen towel or folded napkin
A sharp knife matters more than anything else. Dull blades tear the meat and make carving harder and less safe.
Quick tip. Set a damp kitchen towel under your cutting board. It keeps the board from sliding while you carve.
Know Your Turkey’s Anatomy
Understanding the bird’s shape makes carving much easier. A turkey has two breast halves along the top, separated by the breastbone.
The legs attach at the hip joints near the back. Each leg includes the thigh and the drumstick, joined at the knee.
The wings attach near the neck end of the breast. Like the legs, they connect at joints that separate cleanly.
Joints are the key to easy carving. When you find them, your knife slides through without fighting any bone.
Carving Step by Step
Anchor the Bird
Hold the turkey steady at the breastbone with the meat fork or a folded napkin. Keep your fingers away from the path of the knife.
Place the cutting board on a damp towel so it does not slide. A stable board makes every cut safer.
Remove the Legs and Thighs
Cut through the skin between the leg and the body. Gently press the leg outward and down until the hip joint pops.
Slice through the joint to free the whole leg and thigh. Move it to the small cutting board.
Separate the Drumstick and Thigh
Find the joint between the drumstick and thigh by wiggling the bone. Cut straight through that joint.
Remove the skin from the thigh if you like. Slice the meat off both sides of the thighbone and set the slices on the platter.
Leave the drumstick whole for guests who love dark meat. You can also slice it parallel to the bone for more servings.
Repeat these steps on the other side of the bird.
Good to know. Dark meat takes longest to cook. That is why the thermometer check starts in the thigh.
Carve the Breast
Find the breastbone running down the center of the turkey. Make a cut about 2 inches deep along one side of it.
Gently separate the breast meat from the rib cage with long, smooth strokes. Lift the whole breast half away in one piece.
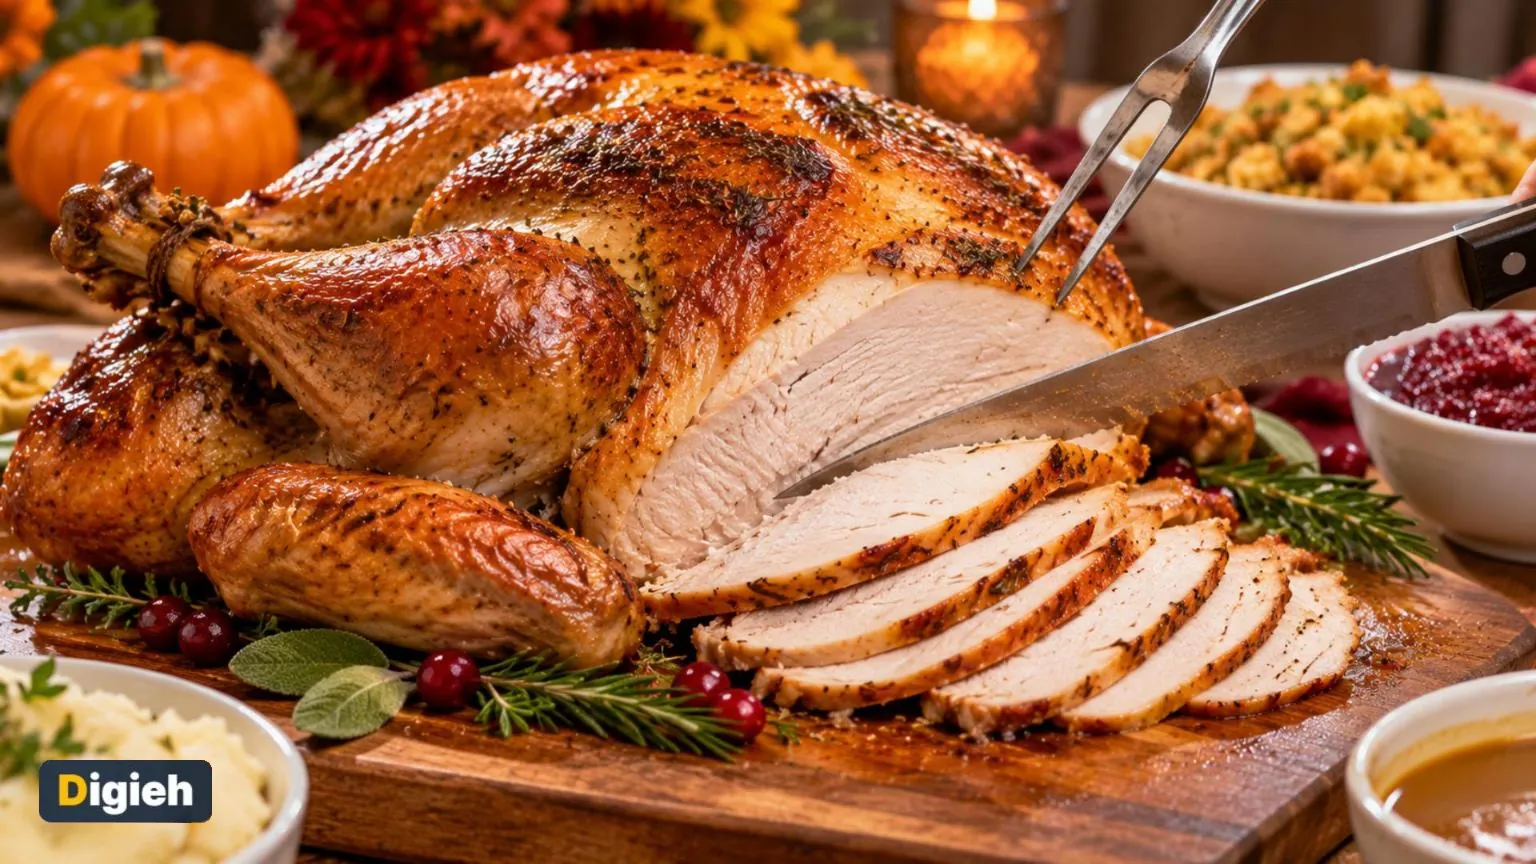
Place it on the cutting board and slice it across the grain into even pieces. Cutting across the grain keeps each slice tender.
Repeat with the other breast half.
Remove the Wings
Pull a wing away from the body to find the joint. Cut through the joint to remove it.
Split the wing at its middle joint if you like. Save the wing tips for making broth.
- Thermometer reads 165 degrees
- Turkey rested 20 minutes
- Knife freshly sharpened
- Board steady on a damp towel
- Platter warmed
- Containers ready for leftovers
The Classic Tableside Method
Some families prefer to carve the breast while it stays on the bird. This old-fashioned style looks impressive at the table.
Make a long horizontal cut just above the wing joint, all the way to the bone. This creates a base line for your slices.
Starting halfway up the breast, slice straight down in thin, even strokes. Each slice falls free when it reaches the base cut.
Keep slicing, starting each cut a little higher than the last. This method is showy, but the kitchen method above gives neater slices across the grain.
Arranging a Beautiful Platter
A well-arranged platter makes the meal feel special. Put the drumsticks and wings at the ends.
Fan the breast slices down the middle. Tuck thigh meat alongside for guests who prefer dark meat.
Garnish with fresh herbs like rosemary, sage or thyme. A few cranberries or orange slices add color.
Spoon a little warm broth or pan juices over the meat. It keeps slices moist while guests fill their plates.
How should you slice turkey breast for the most tender pieces?
- With the grain
- Across the grain
- In thick chunks
Slicing across the grain shortens the fibers and keeps slices tender.
Common Carving Mistakes
Carving too soon
Cutting into a hot turkey right away lets juices run out. Give it a proper rest.
Using a dull knife
A dull knife slips and shreds the meat. Sharpen it the day before.
Hacking through bones
The Illinois guide advises cutting at the joints instead. Joints separate cleanly with gentle pressure.
Slicing with the grain
Slices cut along the grain turn stringy. Always slice breast meat across the grain.
Forgetting a practice run
Nervous about the big day? The Illinois Extension suggests practicing on a chicken first.
Electric Knife or Carving Knife?
Both tools can do the job well. The best choice depends on your comfort and skill.
An electric knife saws through meat with little effort. It works well for people with weak hands or arthritis.
A classic carving knife gives you more control around joints. It is also quieter and easier to clean.
Whichever you choose, keep it sharp and handle it with care. Always cut away from your body and your other hand.
Free updates
Join the Digieh list
Be the first to know when our weekly brief launches.
No spam. Unsubscribe anytime. Read our Privacy Policy.
Knife Safety While Carving
Holiday kitchens are busy, crowded places. A few safety habits prevent painful cuts.
Keep children and pets out of the carving area. Ask helpers to step back while you work.
Never try to catch a falling knife. Step back and let it drop.
Wipe slippery juices from your hands and the handle often. A dry grip is a safer grip.
Set the knife down flat, away from the edge of the counter, when you pause. Never leave it hidden in a sink full of soapy water.
Carving a Turkey Breast
Cooking only a breast is common for smaller gatherings. Carving it is even simpler than a whole bird.
Let the breast rest for about 15 to 20 minutes. Then cut along the breastbone to remove each half.
Lay each half flat and slice across the grain. Serve the slices fanned out on a warm platter.
Carving Smoked or Fried Turkey
Smoked and fried turkeys carve the same way as roasted ones. The skin may be darker or crispier, but the joints sit in the same places.
Fried turkeys often finish faster, so plan your rest time carefully. Smoked turkey meat may look pink near the surface, which is normal for smoked meats.
Always use a food thermometer to confirm doneness, no matter the cooking method. Color alone is not a reliable guide.
Carving Ahead for a Big Crowd
Hosting a large group? Carving in the kitchen before guests sit down keeps things calm.
Carve the turkey, arrange the platter and cover it loosely with foil. Keep it in a warm oven on its lowest setting for a short time if needed.
Moisten slices with warm broth just before serving. This keeps the meat juicy and flavorful.
How Much Turkey to Plan For
A common rule of thumb is about 1 to 1 1/2 pounds of whole turkey per guest. That allows for bones and gives you some leftovers.
Use the calculator to estimate the size of bird you need. Plan a little extra if you love next-day sandwiches.
Turkey size calculator
Based on a rule of thumb of about 1 1/4 pounds per guest.
Storing Leftover Turkey Safely
Leftovers are half the fun of a turkey dinner. Store them correctly to keep them safe.
According to Illinois Extension guidance on storing leftovers, refrigerate leftovers within two hours after cooking. Divide large amounts into small, shallow containers so they cool quickly.
Cooked turkey keeps 3 to 4 days in the refrigerator. In the freezer, it keeps best for 2 to 3 months.
Freeze leftovers while they are still fresh. Waiting until day four will not improve their quality.
Remove the meat from the bones before storing. It takes less space and cools faster.
What to Do With the Carcass
Do not toss the bones. The carcass makes a rich, flavorful broth.
Simmer it with onion, carrots, celery and herbs for a few hours. Strain and use the broth for soups, gravy and stuffing.
Our homemade chicken broth recipe works the same way with a turkey carcass. For more ideas, see our Thanksgiving leftover recipes.
Let the Kids Help
Kids love being part of the holiday kitchen. They can help without going near the knife.
Older children can arrange slices on the platter or add herb garnishes. Younger kids can pass napkins and set out serving forks.
Talk them through each step as you carve. It is a fun way to pass down a family tradition.
Pair It With the Classics
A beautifully carved turkey deserves great sides. Mashed potatoes, stuffing and cranberry sauce are classic partners.
Try our easy homemade gravy and homemade cranberry sauce. If you are still roasting, our guide on how to cook a turkey covers the basics.
Try this today. Check your carving knife and sharpen it if needed. Practice the joint cuts on a roast chicken this week.
Frequently Asked Questions
How long should a turkey rest before carving?
About 20 minutes. Resting lets the juices settle so the meat stays moist.
What knife is best for carving a turkey?
A long, sharp carving knife works best. A sharp chef’s knife is a good substitute.
Should you carve a turkey at the table?
You can, but carving in the kitchen is easier and neater. Bring out a finished platter instead.
How do you keep carved turkey warm?
Cover the platter loosely with foil. Spoon warm broth over the slices to keep them moist.
How long is leftover turkey good for?
Cooked turkey keeps 3 to 4 days in the refrigerator or 2 to 3 months in the freezer.
Conclusion
Carving a turkey is easier than it looks. Check for 165 degrees, let it rest and cut through the joints.
Slice breast meat across the grain and arrange a colorful platter. Store leftovers within two hours, and enjoy turkey sandwiches all weekend.
Found this useful?
Editor’s Note
This guide is accurate as of November 8, 2026. Food safety and carving tips draw on University of Illinois Extension turkey resources.
Spot an error in this article? Please contact us at support@digieh.com or read our Corrections Policy.
Keep exploring
Your next read is waiting
 1HealthWinter Allergies vs Cold Symptoms and Simple Fixes10 min read
 2Finance & MarketsSmart Year-End Charitable Giving Tax Tips for 20269 min read
 3Food & LifestyleClassic French Onion Soup With Golden Melted Cheese9 min read
 4TechnologyCold Weather Car Battery Tips That Prevent Breakdowns10 min read
 5EntertainmentUgly Christmas Sweater Party Ideas Guests Will Love10 min read
 6BusinessEssential Holiday Staffing Tips for Small Business Owners10 min read