TRENDING
How to Waterproof Boots for Winter, Step by Step

8 min read
Last updated November 9, 2026
To waterproof boots, clean them well and choose a treatment made for your boot material. Apply it while the boots are still damp. Let them dry slowly at room temperature, away from heaters or fireplaces.
Retreat your boots whenever water stops beading on the surface. This guide covers leather, suede and fabric boots and the right product for each. It also shows how to keep your feet dry all winter.
Key Takeaways
- Most new hiking boots already have a water-repellent finish.
- Retreat boots when water soaks in instead of beading up.
- Clean boots first, since dirt blocks the treatment.
- Match the product to the material, such as smooth leather, suede or fabric.
- Dry boots slowly at room temperature, never next to a heater.
Inside this guide
- When to waterproof
- Know your boot material
- Step 1, clean the boots
- Step 2, apply the treatment
- Step 3, dry them the right way
- Choosing a product
- Winter boot care
- Storing boots
- Frequently asked questions
When Should You Waterproof Boots?
Most hiking and winter boots come from the factory with a durable water-repellent finish. New boots usually do not need treatment right away.
According to REI, it is time to retreat when water no longer beads up and rolls off. Instead, it soaks into the outer layer and darkens the material.
- Water darkens the boot instead of beading.
- Your socks feel damp after walking through wet grass or slush.
- Leather looks dry, pale or starts to crack.
- It has been a full season of heavy use.
Quick test. Sprinkle a few drops of water on clean, dry boots. If the drops bead and roll off, the finish is still working.
Waterproof vs. Water-Resistant
These two terms sound alike, but they mean different things. Water-resistant boots shed light rain and snow for a while, but water can soak through over time.
Waterproof boots usually have a built-in membrane or sealed construction that blocks water from getting in. They can still lose their outer finish, which makes them feel heavy and cold when wet.
Treatments add water repellency to the outer surface. They cannot turn a canvas sneaker into a true snow boot.
Know Your Boot Material
The right treatment depends on your boot material. Using the wrong product can stain or stiffen them.
| Material | How to spot it | Best treatment |
|---|---|---|
| Full-grain leather | Smooth, slightly shiny surface | Cream, lotion or wax made for smooth leather |
| Suede or nubuck | Soft, velvety, brushed texture | Spray made for suede and nubuck |
| Fabric or synthetic | Nylon, mesh or canvas panels | Spray-on water repellent for fabrics |
| Waterproof membrane | Tag or label inside the boot | Clean the outside and refresh the outer finish |
Many boots mix materials, such as leather with fabric panels. Choose a product labeled safe for all the materials on your boots.
What kind of boots do you wear most in winter?
- Leather boots
- Suede boots
- Synthetic hiking boots
- Not sure
Step 1. Clean the Boots
Treatments only stick to clean surfaces. Dirt and salt also wear down leather and fabric over time.
- Remove the laces and insoles.
- Brush off dried mud with a stiff brush.
- Rinse the boots under running water.
- Scrub with a boot cleaner or a little mild soap.
- Rinse again until the water runs clear.
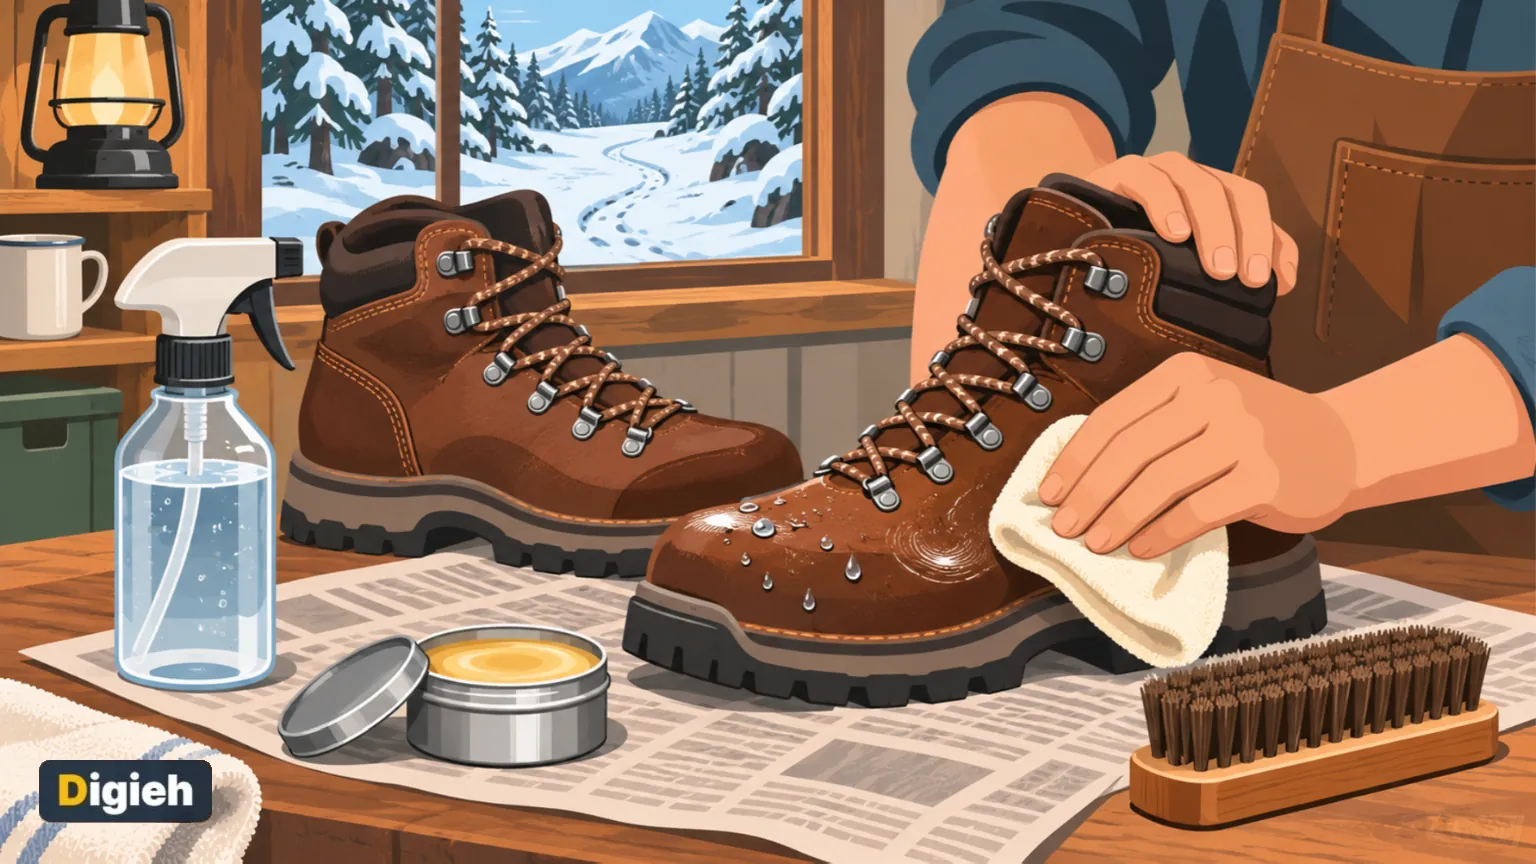
REI notes that most treatments work best on clean, damp boots. If your boots dried after cleaning, wrap them in a wet towel for a couple of hours.
Wash fabric laces in warm, soapy water and let the insoles air dry on their own. Fresh laces and dry insoles help your boots last longer and smell much better.
Step 2. Apply the Treatment
For smooth leather
Work a leather cream or lotion into the damp boots with a soft cloth or your fingers. Pay extra attention to seams and the area where the upper meets the sole.
Wax-based products give strong protection but can darken leather. REI also warns that wax residue can make it harder to glue on a new sole later.
For suede and nubuck
Spray an even coat from about 6 inches away. Do not soak the surface, and brush the nap gently once dry.
For fabric and synthetic boots
Spray a water repellent evenly over the fabric, including seams and tongue gussets. Wipe off any extra with a clean cloth.
Always read the product label. Steps and drying times vary from brand to brand.
Step 3. Dry Them the Right Way
Many people ruin good boots during drying. Heat can crack leather, weaken glue and shrink materials.
- Dry boots at normal room temperature in a low-humidity spot.
- Stuff them with newspaper and replace it when it gets damp.
- Use a fan to speed things up.
- Keep them away from radiators, heaters, fireplaces and campfires.
Expect drying to take a day or more. Be patient, since slow drying protects your boots.
2 hrsAbout how long REI suggests wrapping dry boots in a very wet towel so leather soaks up water before treatment.
Choosing a Waterproofing Product
| Product type | Pros | Cons |
|---|---|---|
| Spray | Fast and easy, works on many materials | Wears off faster |
| Cream or lotion | Conditions leather, keeps it soft | Takes more time to apply |
| Wax | Strong water protection | Can darken leather and affect resoling |
Look for water-based products that are free of harsh solvents. They are easier on materials and safer to use indoors.
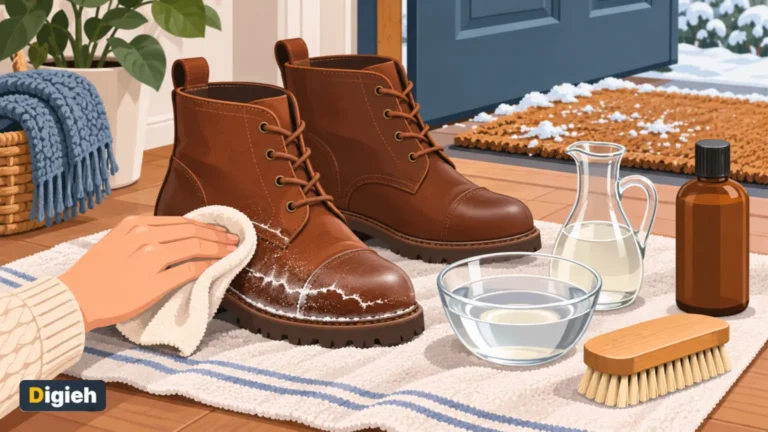
Already seeing white marks? Learn how to remove salt stains from shoes and boots.
Winter Boot Care
Snow, slush and road salt are tough on boots. A little care after each outing goes a long way.
- Wipe off salt and slush as soon as you come inside.
- Rinse salt stains with a cloth dipped in a mix of water and a little white vinegar.
- Let wet boots dry overnight before wearing them again.
- Rotate between two pairs if you wear boots every day.
- Recondition leather every few weeks in heavy use.
Dry feet are warm feet. Wet socks raise the risk of cold injuries, so learn the warning signs of frostbite and hypothermia.
Free updates
Join the Digieh list
Be the first to know when our weekly brief launches.
No spam. Unsubscribe anytime. Read our Privacy Policy.
Socks and Layers Matter Too
Even waterproof boots can feel wet inside if your feet sweat. Wear wool or synthetic socks that pull moisture away from your skin.
Skip cotton socks, which hold sweat and stay damp. Read our guide on how to layer clothes for cold weather for more tips.
Gaiters help on snowy trails. They stop snow from slipping in over the top of your boots.
Fixing Small Leaks
Sometimes water sneaks in even after treatment. Look closely to find where it enters.
- Check seams and stitching for gaps.
- Look for cracks where the boot flexes near the toes.
- Inspect the line where the upper meets the sole.
- Feel inside for damp spots after a short walk in wet grass.
A seam sealer made for footwear can fix small gaps along stitching. For a separating sole or a large crack, take the boots to a shoe repair shop.
Boots for Kids
Kids splash through every puddle, so their boots need extra care. A quick spray of water repellent before winter helps a lot.
Check the fit each season, since growing feet can outgrow boots fast. Tight boots cut off circulation and make toes colder.
When to Replace Your Boots
- The soles are worn smooth and lose grip.
- The leather has deep cracks that keep leaking.
- The inner lining is torn or falling apart.
- Your feet hurt or feel unstable after short walks.
Good boots can last many seasons with care. When they stop protecting you, it is time for a new pair.
Common Waterproofing Mistakes
- Treating dirty boots
- Using a leather wax on suede
- Drying boots next to a heater or fire
- Applying too much product at once
- Waiting until boots leak badly before retreating
How to Store Boots
REI advises storing boots in a place with stable, normal temperatures. Avoid attics, garages, car trunks and damp basements.
- Clean and dry boots fully before storing them.
- Loosen the laces and stuff the toes with paper.
- Keep them out of direct sunlight.
- Store them upright, not crushed under other gear.
Storing outerwear too? See how to wash a down jacket before you pack it away.
Get Outside With Dry Feet
Well-treated boots make winter more fun. Try a snowy trail with our winter hiking tips for beginners, or try snowshoeing for beginners.
Clearing the driveway? Good boots with solid grip help, and our guide on how to shovel snow safely covers the rest.
Traveling somewhere cold? Add a small tube of boot treatment to your winter packing list.
Your Boot Waterproofing Checklist
- Test with a few drops of water
- Clean off dirt and salt
- Match the product to the material
- Apply to damp boots
- Dry slowly at room temperature
- Store in a cool, dry place
Test Yourself
How should you dry boots after waterproofing?
- Next to a heater
- In a hot car
- At room temperature with newspaper inside
Heat can crack leather and weaken glue, so dry boots slowly.
What is a sign your boots need retreating?
- Water soaks in instead of beading
- The laces look new
- The soles feel grippy
When water stops beading, the water-repellent finish has worn off.
Frequently Asked Questions
How often should I waterproof boots?
Whenever water stops beading, often once or twice a season.
Can I waterproof suede boots?
Yes. Use a spray made for suede and nubuck.
Does waterproofing make boots fully waterproof?
It helps shed water, but leaks at seams or worn spots can still happen.
Can I use a hair dryer to dry boots?
It is better not to. Heat can damage leather and glue.
Conclusion
Waterproofing boots is simple. Clean them, pick a product for the material, apply it to damp boots and let them dry slowly.
Check them often during winter, wipe off salt and enjoy warm, dry feet all season.
Found this useful?
Editor’s Note
This guide is accurate as of November 9, 2026. It draws on boot care advice from REI.
Always follow the care label and product directions for your own boots.
Spot an error in this article? Please contact us at support@digieh.com or read our Corrections Policy.
Keep exploring
Your next read is waiting
 1Food & LifestyleEasy Fudgy Brownies Recipe From Scratch8 min read
 2Finance & MarketsHigh-Yield Savings Accounts Explained for Beginners8 min read
 3EntertainmentChristmas Traditions Around the World: 15 Festive Customs8 min read
 4MedicinesHow to Read a Drug Facts Label on Over-the-Counter Medicine8 min read
 5Home & KitchenHow to Insulate Windows for Winter on a Budget8 min read
 6FashionHow to Remove Salt Stains From Shoes and Boots8 min read